So far we’ve covered:
- Using Host services in WPF for dependency injection
- Integrating CommunityToolkit.Mvvm to support the MVVM architecture
- The Messenger in CommunityToolkit.Mvvm as a pseudo Event replacement
Up next is adding an API for our app to talk to and store messages. This will be done with ASP.NET Core Web API, back-ended with a Sqlite database.
I’ll start by adding a new ASP.NET Core Web API project to our existing application and call it “ChatterAPI”
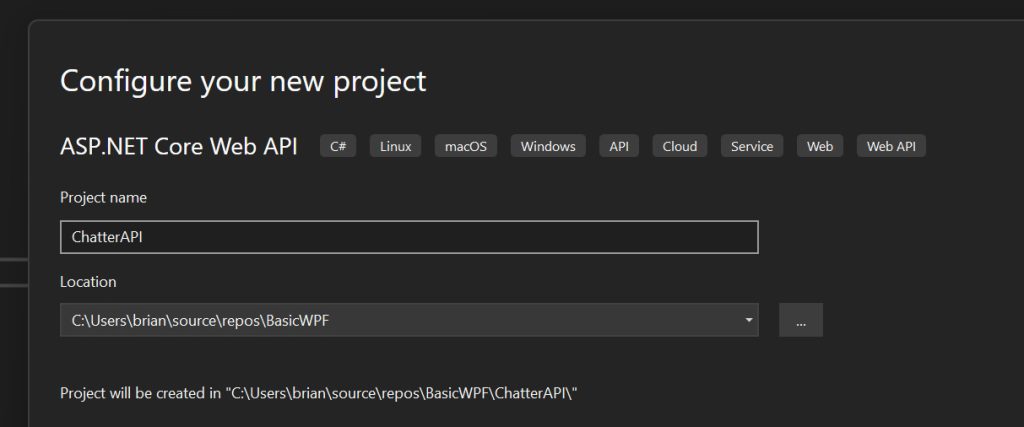
We’re going to take the Minimal API approach to this to make it as simple as possible.
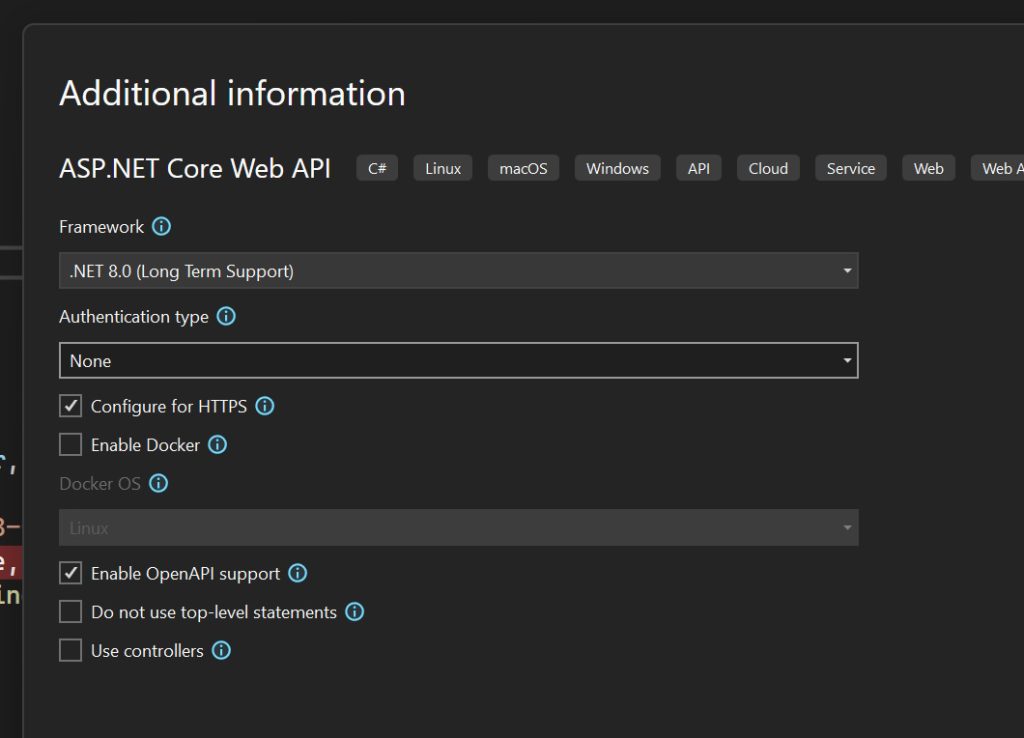
Make sure “Use Controllers” is unchecked. We want this as basic and simple as possible. Click “Create”.
Next open the Program.cs. We want to strip out all the example WeatherForecast stuff since we don’t need it. My code ends up looking like:
var builder = WebApplication.CreateBuilder(args);

// Add services to the container.
// Learn more about configuring Swagger/OpenAPI at https://aka.ms/aspnetcore/swashbuckle
builder.Services.AddEndpointsApiExplorer();
builder.Services.AddSwaggerGen();

var app = builder.Build();

// Configure the HTTP request pipeline.
if (app.Environment.IsDevelopment())
{
    app.UseSwagger();
    app.UseSwaggerUI();
}

app.UseHttpsRedirection();

app.Run();
Add a new folder to the API project titled, “Data”. This is where we’re going to add our models that represent our tables in the Sqlite database. We only need one here as this will just store messages. And now I’ll add a new class to that folder called Message that will represent the chat messages I send around.
public class Message
{
    public int Id { get; set; }
    public string Username { get; set; }
    public string JsonMessage { get; set; }
}
Now we need all of our EntityFramework nuget packages. To the ChatterAPI add the following packages:
Microsoft.EntityFrameworkCore
Microsoft.EntityFrameworkCore.Sqlite
Microsoft.EntityFrameworkCore.Tools
Note that the Tools need to be installed to the start-up project. In my case I just made the API my start up project and the rest proceeded just fine. Afterwards I just reverted the start up project. If you have a different start up project you’ll need to either temporarily change the start up to the API or add the tools to your start up project.
The next step is kind of, well, funky. We need what’s called a DbContext that should represent all our tables. Generally you would pass in the connection string to the database on the constructor but here I’m integrating in the database as part of the application. As such I’m going to embed the path to the database directly.
Create a MessageDbContext that extends DbContext in the root of the solution.
public class MessageDbContext : DbContext
{
    public DbSet<Message> Messages { get; set; }

    public string DbPath { get; }
    public MessageDbContext()
    {
        var path = Directory.GetCurrentDirectory();
        DbPath = System.IO.Path.Join(path, "Database", "messages.db");
    }

    protected override void OnConfiguring(DbContextOptionsBuilder options)
        => options.UseSqlite($"Data Source={DbPath}");
}
In the ctor it states that the database will be in the Database directory so create that directory in the project. The other point of interest is the DbSet<Message>. This is the table where we’re going to store our messages.
public class MessageDbContext : DbContext
{
    public DbSet<Message> Messages { get; set; }

    public string DbPath { get; }
    public MessageDbContext()
    {
        var path = Directory.GetCurrentDirectory();
        DbPath = System.IO.Path.Join(path, "Database", "messages.db");
    }

    protected override void OnConfiguring(DbContextOptionsBuilder options)
        => options.UseSqlite($"Data Source={DbPath}");
}
So that’s all the code and configuration we need for a code first approach to adding a sqlite db. Now we need to actually create the migration file and database. This is done using the tools package we installed earlier. There is also a database first path we could have used if we were using an existing database.
Open the Package Manager Console. We want to do the following steps:
- Navigate to our project
- PM> cd ChatterAPI
- Create the migration file
- PM> Add-Migration -Project ChatterAPI
- It will ask you to name the migration file
- Supply values for the following parameters:
Name: MessagesMigration - You might have to type slow as it seemed to miss quite a few characters as I was typing.
- Supply values for the following parameters:
- And finally create the database
- PM> Update-Database -Project ChatterAPI
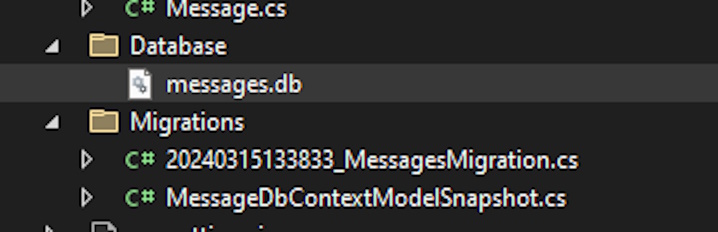
This will create a Migrations folder, the migration files and the database.
The MessagesMigrations.cs tells the tools how to handle all the tables in the database. There is an Up and Down. Up is how the tables should be created and Down is how they should be deleted. If something didn’t look right I could:
- PM> Remove-Migration -Project ChatterAPI
- delete the database
- fix whatever code needed to be fixed
- PM> Add-Migration -Project ChatterAPI
- PM> Update-Database -Project ChatterAPI
That would recreate everything.
MessageDbContextModelSnapshot.cs is how EnityFramework knows how everything maps from table to class.
From here you could install DB Browser for SQLite and take a look at what was created:
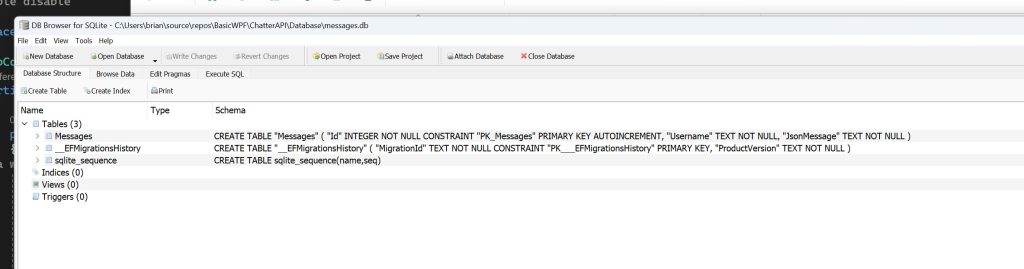
So I supposed before I go too much further I want to confess that this works great for a demo chat app. But in a production environment I would put most of this in it’s own project. The reason is that, in general, there should be a separation of concerns in projects. That’s the premise behind n-tiered architecture. It’s nice to keep the data layer stuff to a data layer project. Things are pretty small here but if this were a production application the data layer could grow pretty rapidly and everything is easier to maintain if the data layer is in it’s own project. It’s also easier to do unit tests for.
In the next post I’ll discuss using EntityFramework and build out a couple of REST services with the Minimal API.
Thanks,
Brian
One thought on “Adding EntityFramework and Sqlite to ASP.NET Core Web API”